Learn how to make lovely little origami lucky stars, sometimes called wishing stars. Usethem to add color to a room, as party decorations, add them to gift wrap, or use them to bring a little luck to your life.
These origami lucky stars are made with strips of paper cut about 10 inches to 11 inches long. Each strip can be as wide as 1/4 inch, 1/2 inch, or 3/4 inch. Thinner strips make smaller stars while wider strips make larger stars.
Spend as much time as is needed to make the knot and wrap the pentagon of your star as neat and tight as possible. Making them neat ensures your little origami lucky stars will turn out puffy, but sturdy as well so you can easily hold them while making a wish.
INSTRUCTION
1 Start Folding the Strip of Paper
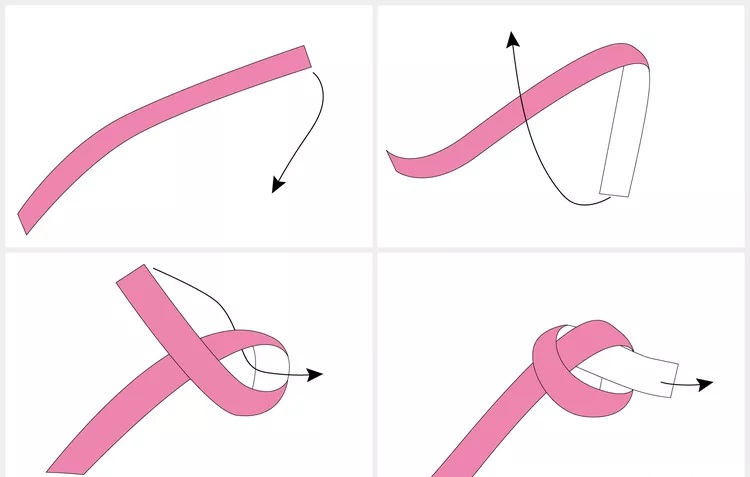
Start with your strip of paper color side up if you're using colored paper or origami paper.Follow the steps according to the illustrations below.
-Bring the right end of the paper over and down (top left square).
-Bring the bottom end up and over the left end (top right square).
-Now that you have a loop, feed the top end behind and through the hole (bottom left square).
-Continue to pull the end through the loop, also gently pull the bottom end to tighten the knot (bottom right square).
2 Make the Knot of the Star
Follow the steps according to the illustrations below.
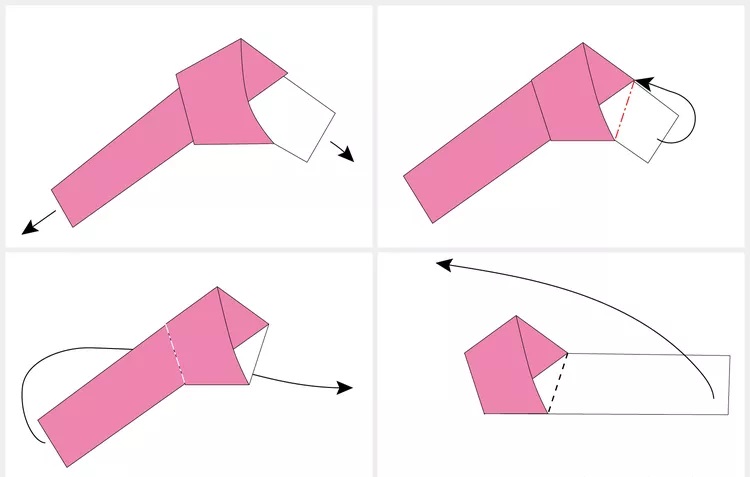
-Keep wiggling and pulling the knot tighter, flattening it at the same time (top left square).
-The end of the paper strip on the left should be much longer than the end on the right.
Fold the excess end behind. You do not need to cut it off but you can do it if it's too long (top right square).
-Fold the end on the left behind, keeping the bottom edge aligned with the bottom edge of the shape in the center (bottom left square).
-Continue wrapping the pentagon. Fold the strip on top, over to the top left (bottom right square).
3 Keep Wrapping the Pentagon
Again wrap the pentagon following the steps according to the illustrations below.
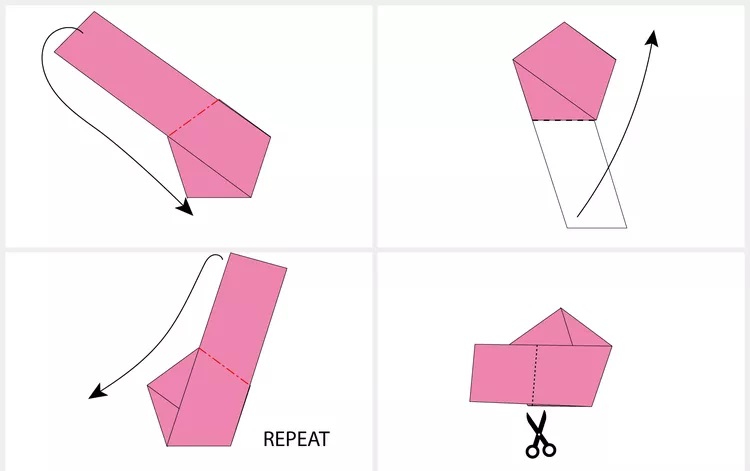
-Fold the strip down behind to the bottom (top left square).
-Fold the strip up and over to the right (top right square).
-Fold the strip over behind to the left and continue until you only have a small section left (bottom left square).
-If your strip is just a bit too long, cut it or tear it off (bottom right square).
4 Finish Tucks and Inflate the Star
Finish the star by following the illustrations below:
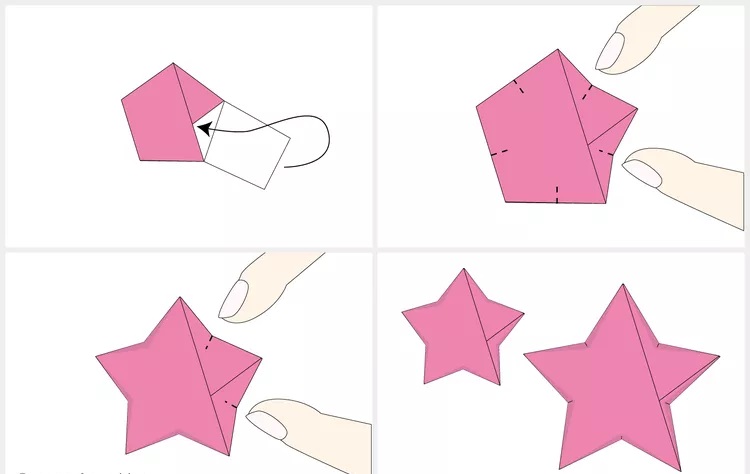
-Insert the end of the strip inside the pocket (top left square).
-Now inflate the star. To do this, use your index finger and thumb to pinch in one of the points of the star (top right square).
-Rotate the star and gently do the same on all of the points (bottom left square).
-You can get different results by pinching more or less at this stage (bottom right square).


.jpg)
.jpg)
.jpg)
.jpg)
