
One tried-and-true way to get into the holiday spirit is to decorate your home for the season. From trimming the tree to hanging stockings by the mantle, these details give your space a cozy and festive atmosphere. And it doesn't take much to fill your home with on-theme décor—all you need is paper and scissors and you can make an entire forest of Christmas trees to deck the halls with.
These origami Christmas trees, which come from our contributor Kara Whitten, are a cinch to make and pack a festive punch that lasts the season. There are two ways to make them: one with straight edges for a modern look and one with upturned edges to mimic real branches. Make both to give your set-up a forest-inspired appearance, or go with just one fold for a minimalist aesthetic.
When choosing paper for your homemade forest, we recommend choosing various shades of green rather than going monochromatic. From rich forest-inspired hues to sage and light green, using kraft paper in all different colors adds depth to your display. Or go a different direction entirely and choose festive patterned paper or brightly colored paper to fit the aesthetic of the rest of your holiday décor. Another way to elevate this easy project is to decorate your trees with beads, stars, and other adornments. You can use markers or hot glue three-dimensional details on the paper.
No matter what look you want to achieve, this DIY Christmas craft is something the whole family can join in on.

· Green paper roll
· Scissors
Step 1

Cut paper into squares. For large trees, you will need one 4-by-4-foot square, one 3-by-3-foot square, and one 2-by-2-foot square. For all other smaller trees, one square (of any size) will yield one tree.
Step 2
Fold paper:
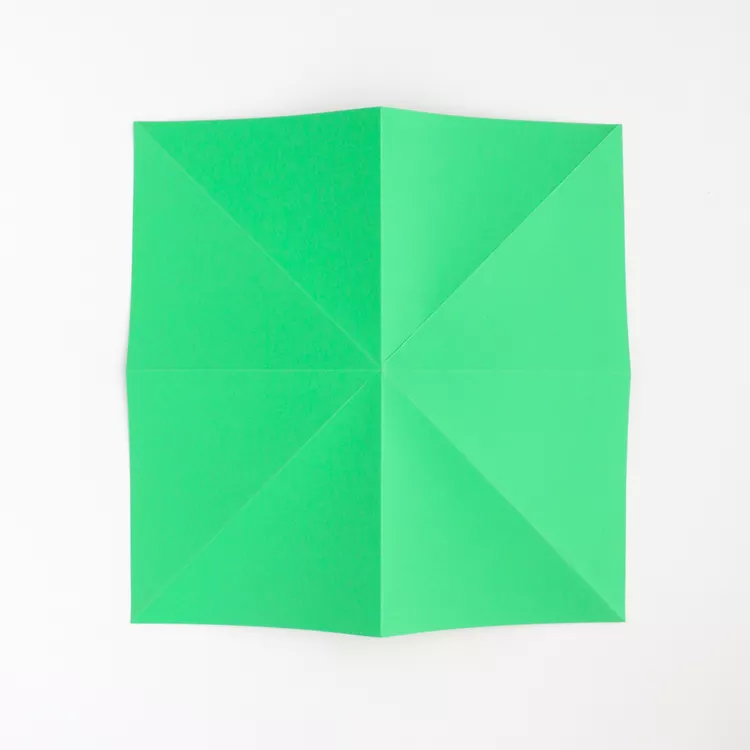
Fold the square piece of paper corner to corner, producing a triangle. Next, fold that triangle in half to create a smaller triangle. Open the paper back up and fold in half to create a rectangle and then fold the rectangle in half to create a square. Unfold to reveal the crease lines.
Step 3

Next, tuck the two sides towards the center line to create a diamond shape.
Step 4

Fold in the left and right side flaps to the center line on both sides to form a kite shape.
Step 5

Taking one side at a time, open the fold and fold the edge inward towards the center of the kite. Repeat with all four flaps.
Step 6

Use your scissors to cut off the bottom triangle of the kite shape as shown. Make sure that you are cutting off the open tip and not the folded tip.
Step 7
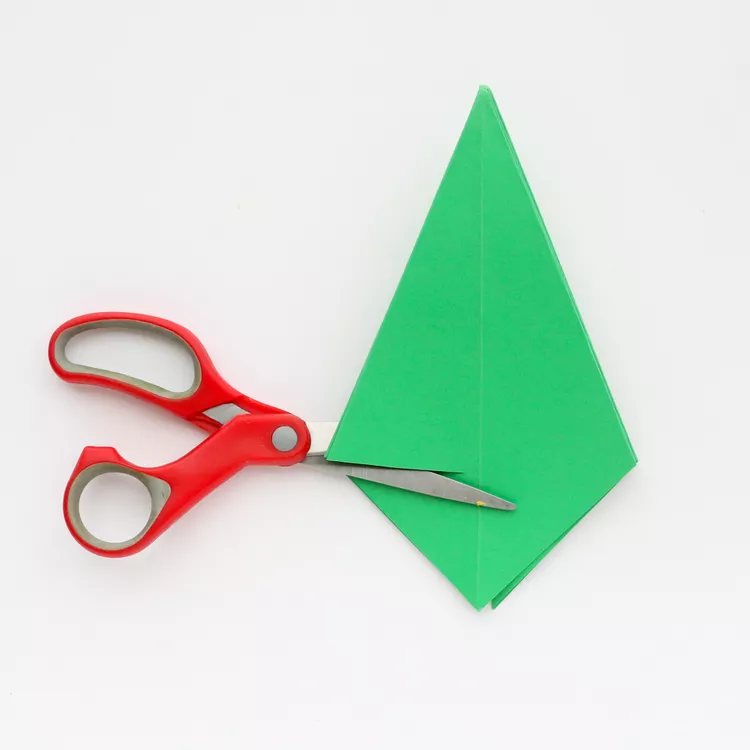
Spread out the flaps slightly to create your straight-edged tree. For the folded edge tree, continue on to step 8.
Step 8

Using scissors, cut horizontal lines into each of the 6 flaps. (The size of the lines will vary depending on the size tree you are making, but we recommend to cut approximately half-way in towards the center of each flap.)
Step 9
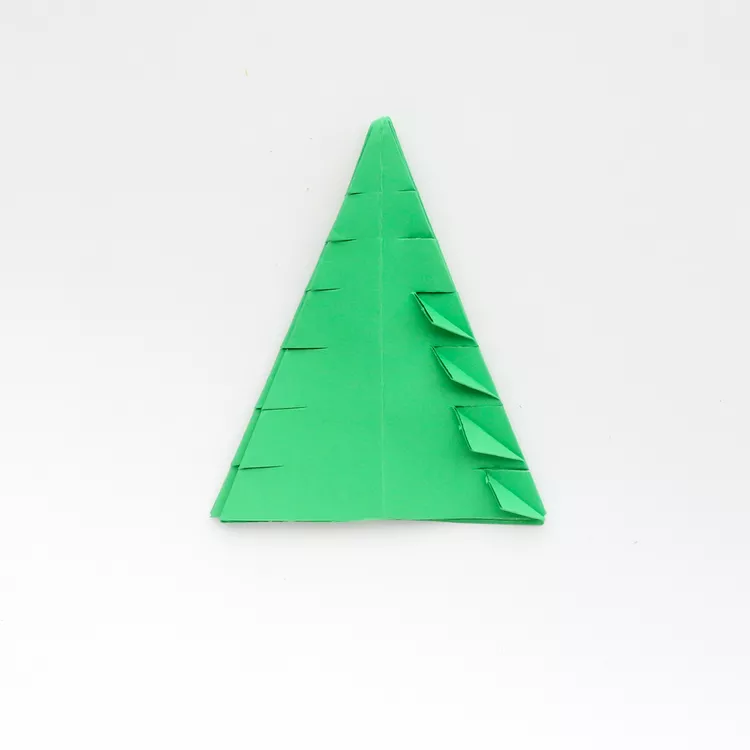
Fold the cut lines down to create small triangles; repeat around all 6 sides of the tree.
Step 10

For large paper trees, once all three squares have been folded into trees, simply stack them one on top of the next (starting with the largest tree on the bottom) to create a tall origami paper tree.